I am fascinated by videos of happy children that plays with pieface game. I have never had this, so i decided to build myself an adult-sized, low-budget version, based on ESP8266 board.
TODO: VIDEO OF MATCH
Rule of the game
Pieface is a 2 player game. Each player push a button repeatedly. The challenge push the button faster than the opponent. When the winner win, the looser received a pie in face.
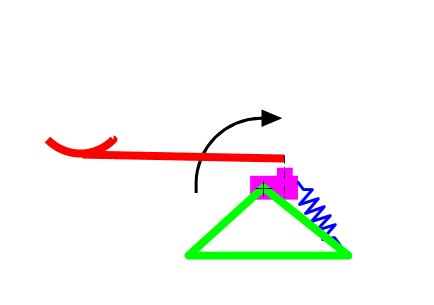
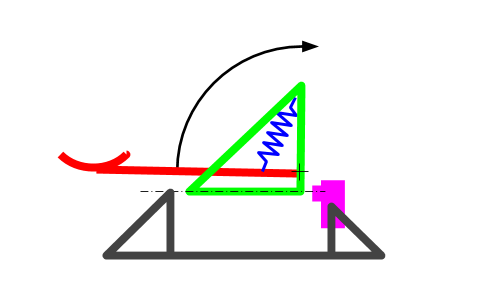
From a mechanical perspective the pieface game is basically an orientable catapult; the trigger is the difference number of button pressures.
Parts of System
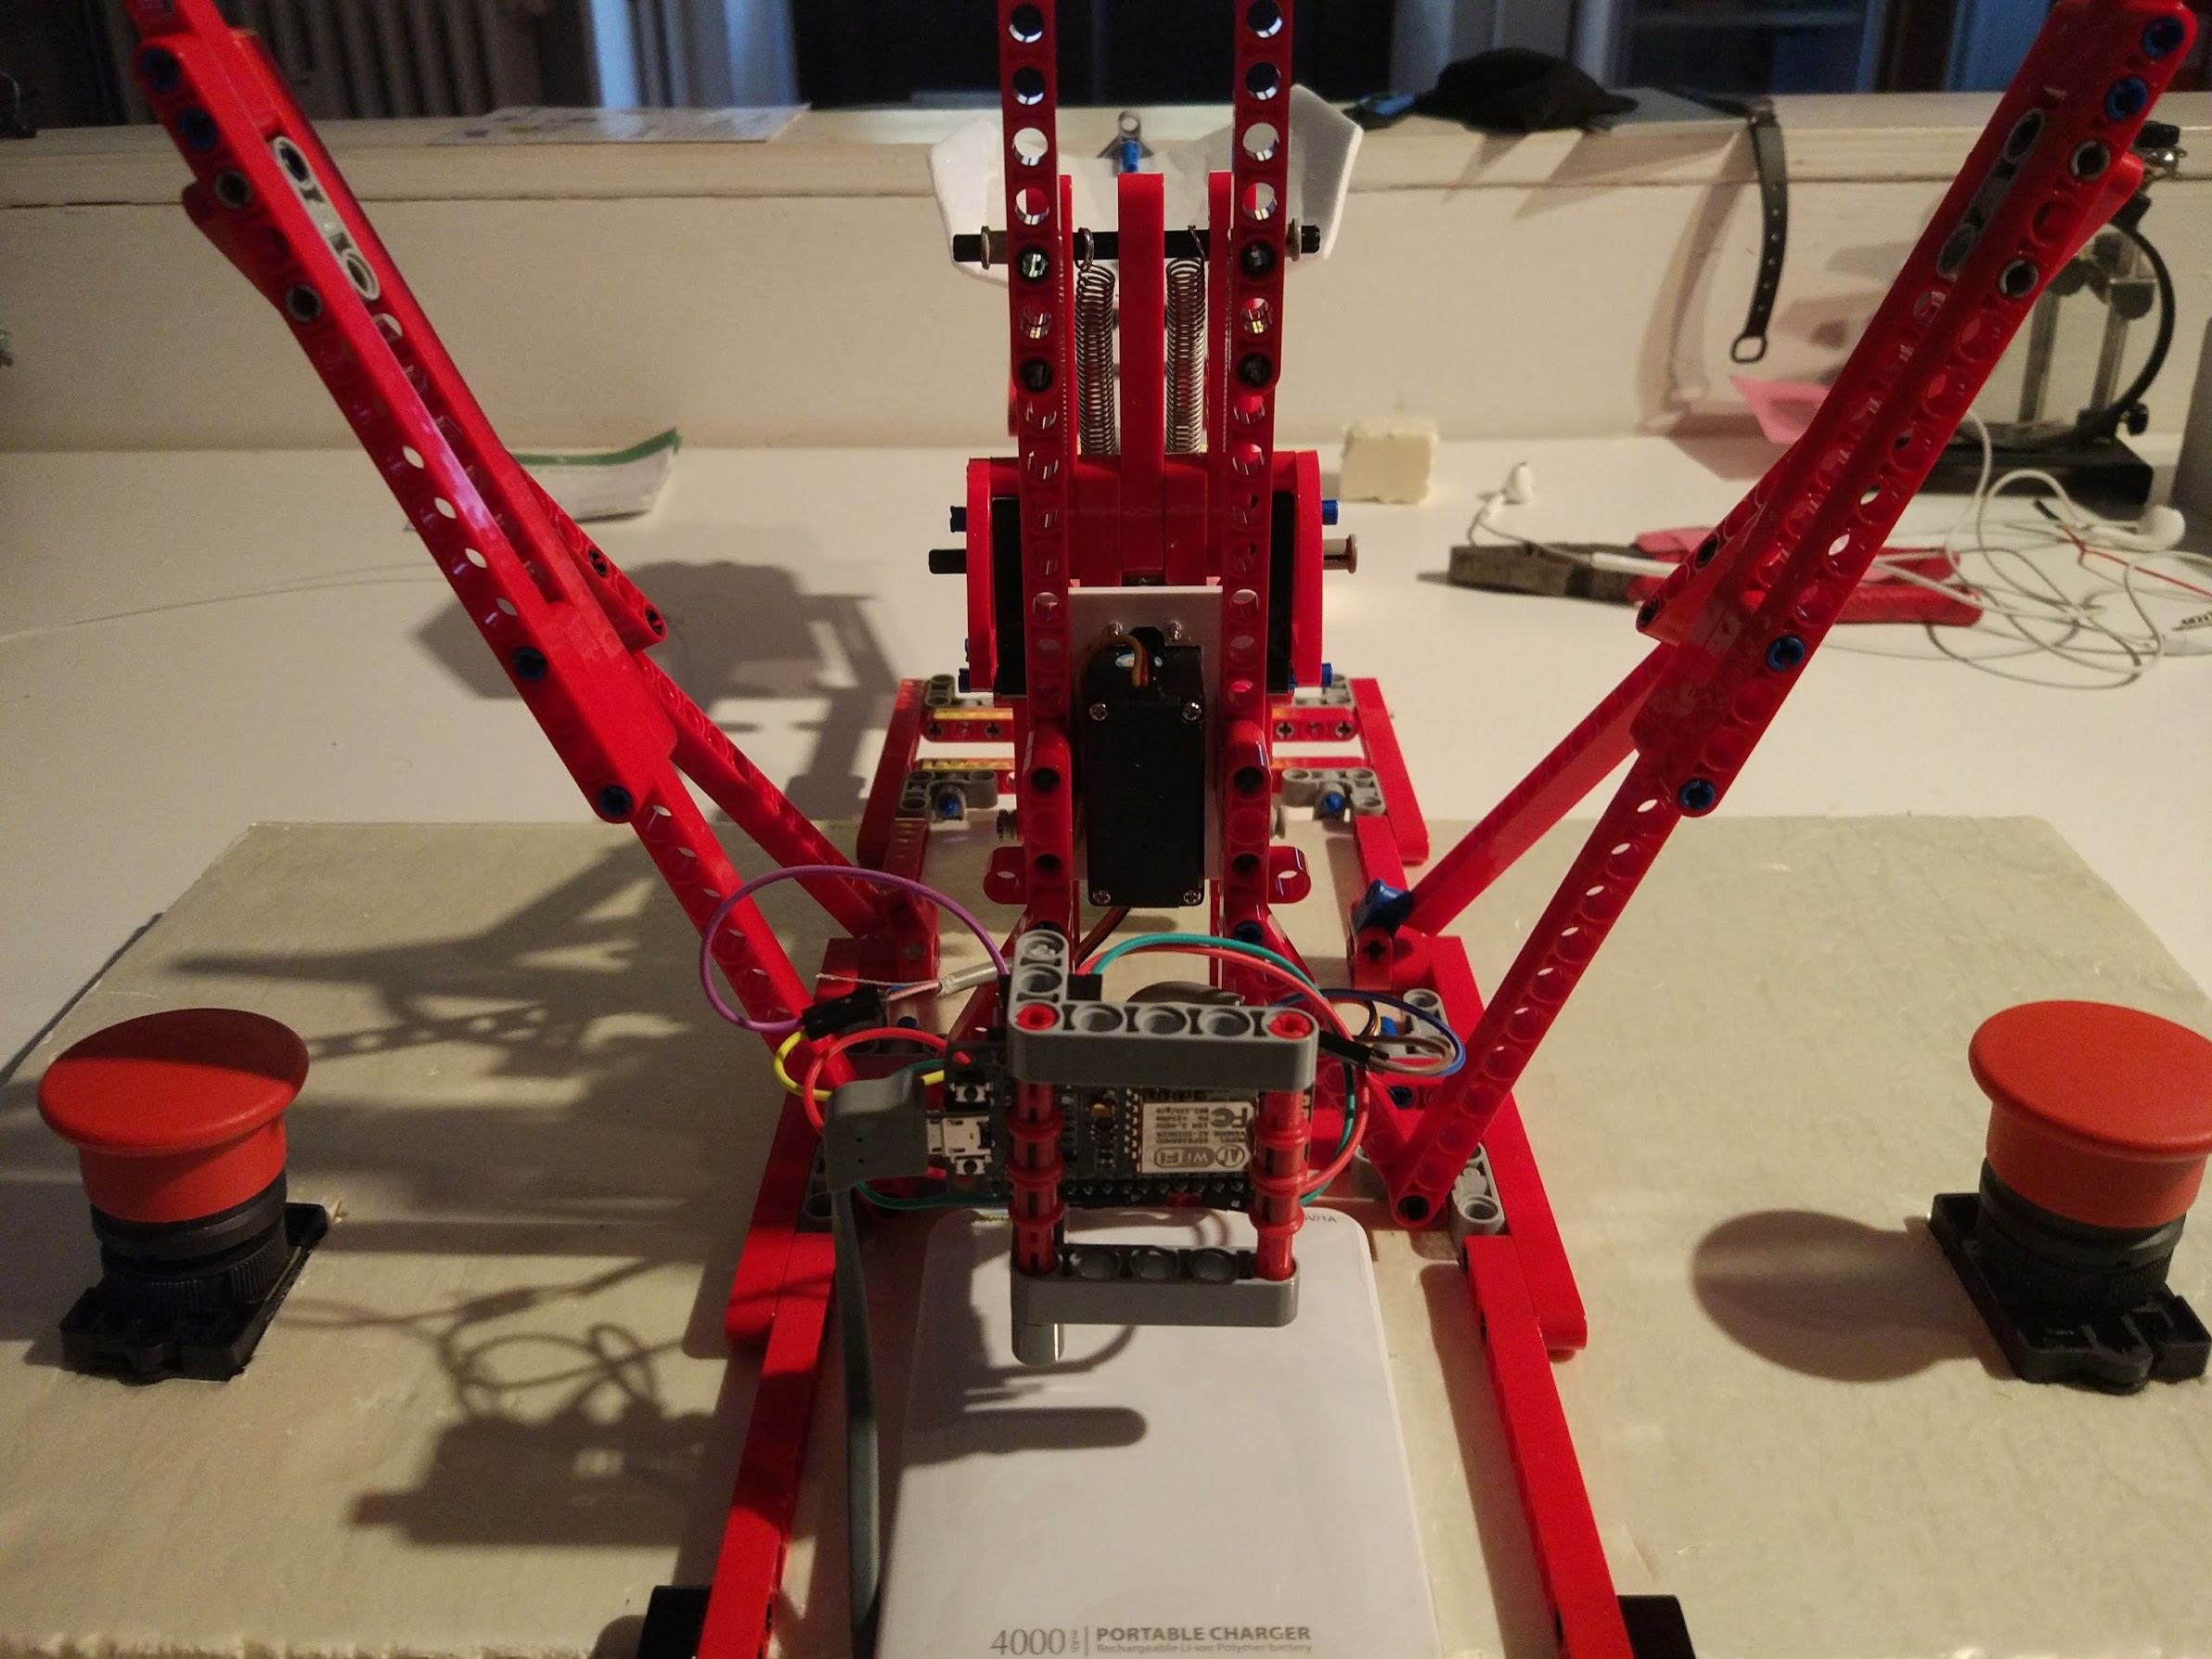
- 2 players
- 2 buttons
- 2 rc servos:
- 1 direction rc servo
- 1 unlock mechanism rc servo
- 1 microcontroller
- Springs
- Lego technic beam
- Spoon
- Cream
- Battery
Microcontroller
I choose a NodeMCU board (and Esp8266 powered board) because is cheap, Arduino compatibile and I already have one in my house. In this project I don’t use wifi, but with a wifi-ready board any upgrade in the wifi direction (i.e. tablet or website) is feasible.
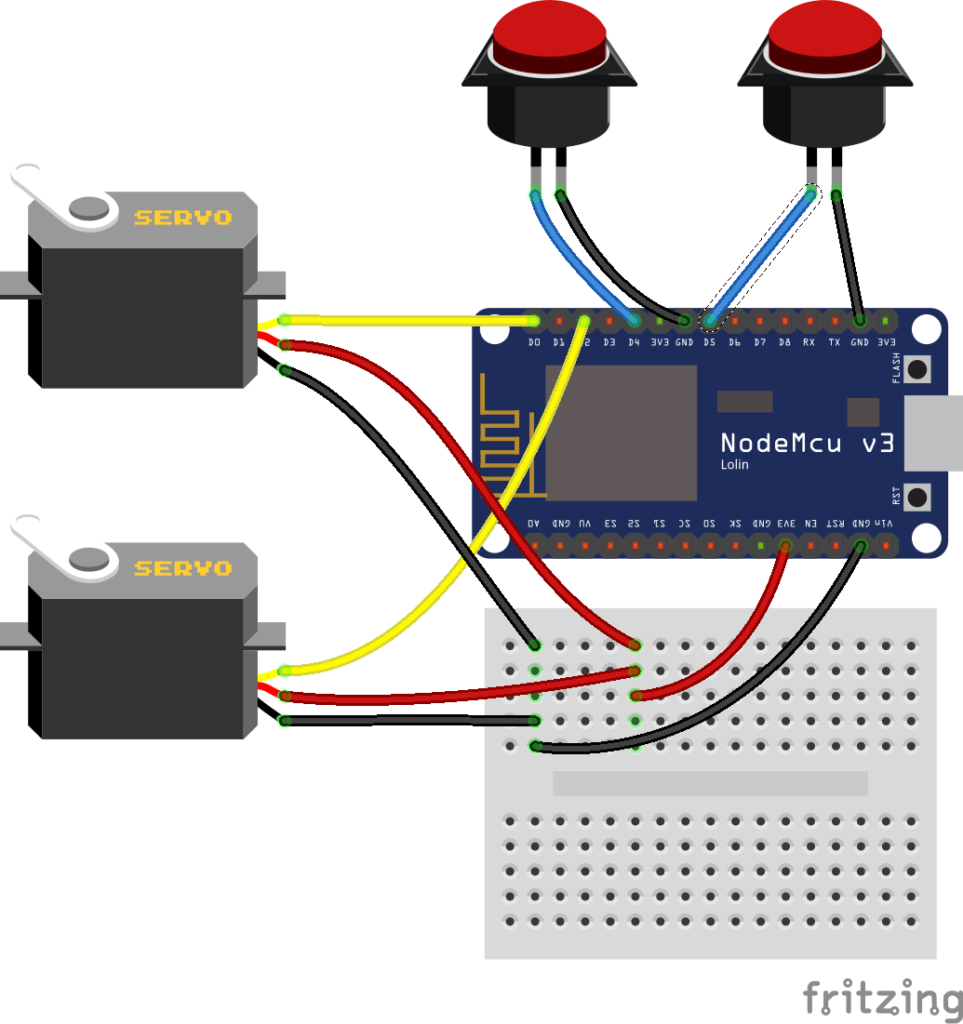
Wiring
The wiring of the electronic part is minimal. The two buttons are connected on D4 and D5Â (pull-up mode), the command pin of the two rc servos are connected D0 and D1.

Software / Esp8266 code
The program on the Esp8266 count the delta between button press. This delta guide the direction rc servo (that orient the spoon on the face of one player or another). When the delta reach a limit, the second rc servo unlock the spoon pouring the cream on the loser.
// only loop method
// full code on https://github.com/albertosarullo/pieface-game-diy-arduino-esp8266
void loop()
{
  int rightButtonValue = digitalRead(rightButtonPin);
  int leftButtonValue = digitalRead(leftButtonPin);

  if (rightButtonValue && !oldRightButtonValue) {
    delta = delta + 1;
  }
  if (leftButtonValue && !oldLeftButtonValue) {
    delta = delta - 1;
  }

  digitalWrite(LED_BUILTIN, !(leftButtonValue || rightButtonValue));

  // min: 55°, max: 125°
  servoPosition.write(90 + delta * 1.7);

  if (delta > limit || delta < -limit) {
     launch();
  } else {
     block();
  }

  oldRightButtonValue = rightButtonValue;
  oldLeftButtonValue  = leftButtonValue;

  delay(10);
}
For the complete source code visit https://github.com/albertosarullo/pieface-game-diy-arduino-esp8266
Physical Implementation
As is often the case in these projects, i choose an iterative approach: design, develop, test.
Iteration #1 – Exploration Sketch
At the beginning i made some sketch on paper to explore different hypothesis/solution and have an vague idea of the mechanical parts.
I made simple cardboard prototypes not in scale, simply to explore feasibility.
A crucial point is that  the structure is subject to a high force on launch time.
Iteration #2 – First Prototype
In this phase I use a PVC sheet for build the structure, but after the some trial I quickly change my plan, because basically I seemed to waste time cutting non reusable piece of plastic.
So I switch to Lego brick: they are more robust, modular, and guarantee rapid prototype speed.
For the structure, I follow the Hasbro version: a horizontal pivot (spring powered), on which is mounted a vertical pivot (orientation rc servo).
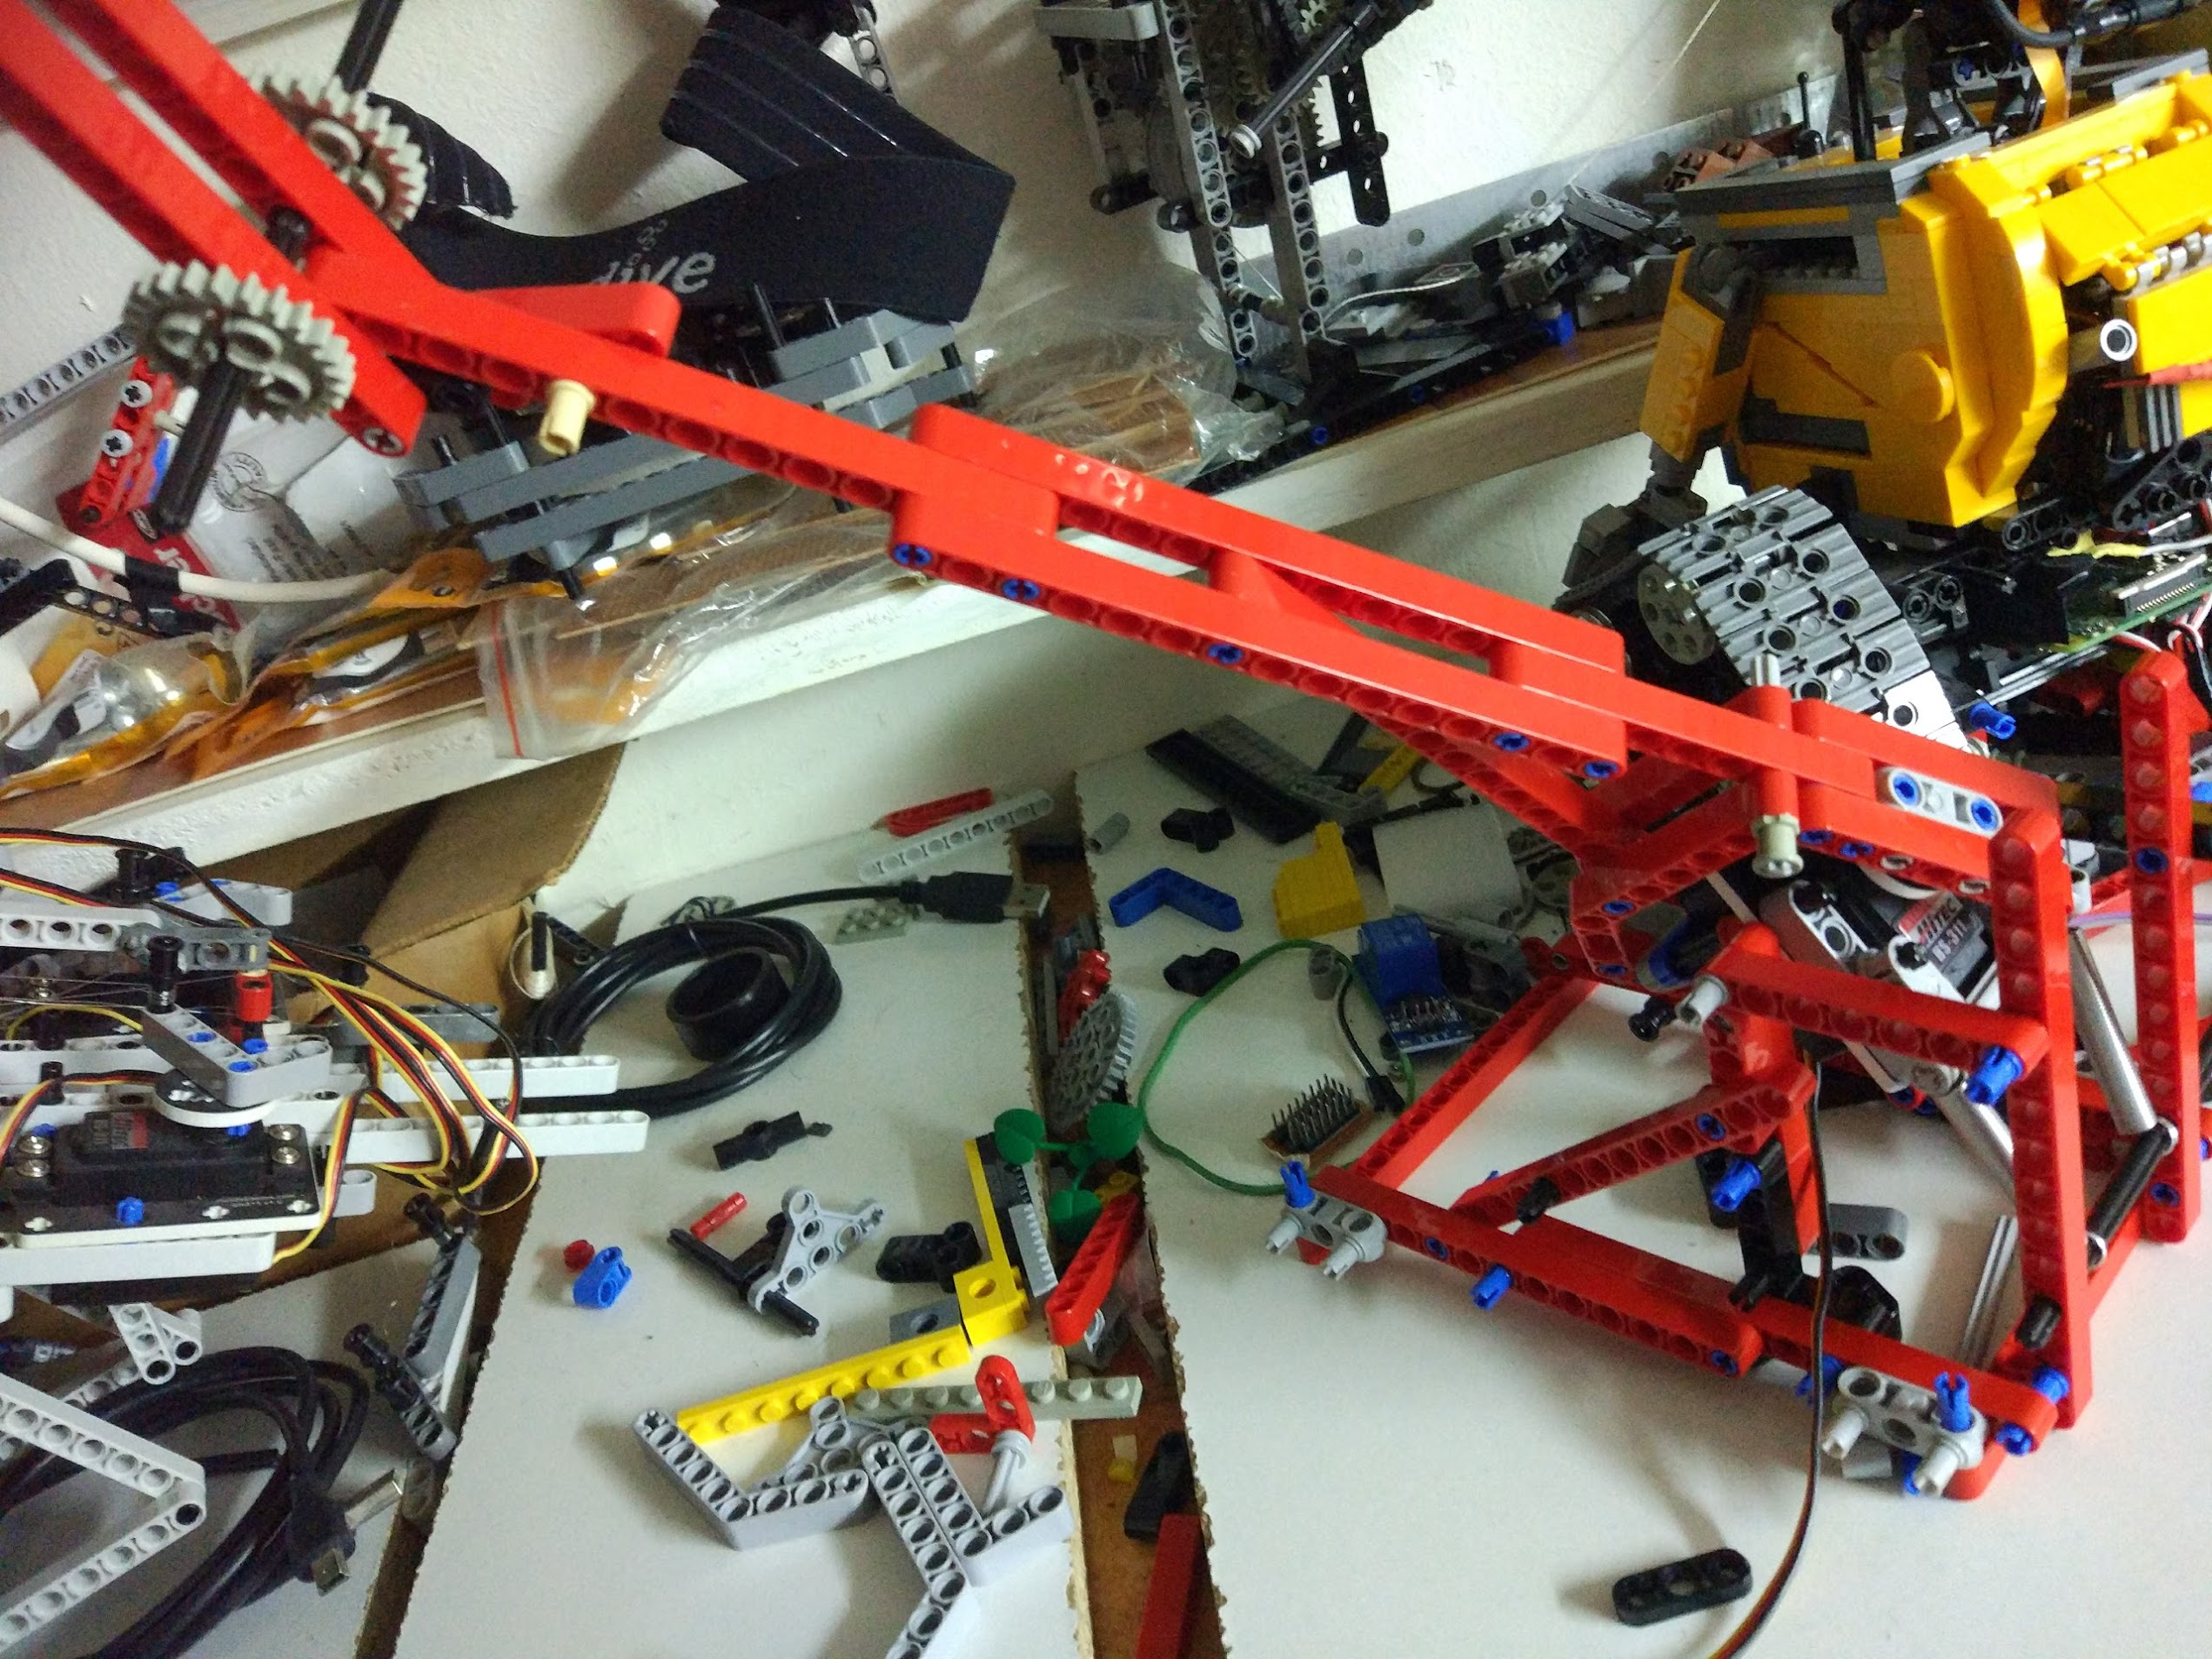
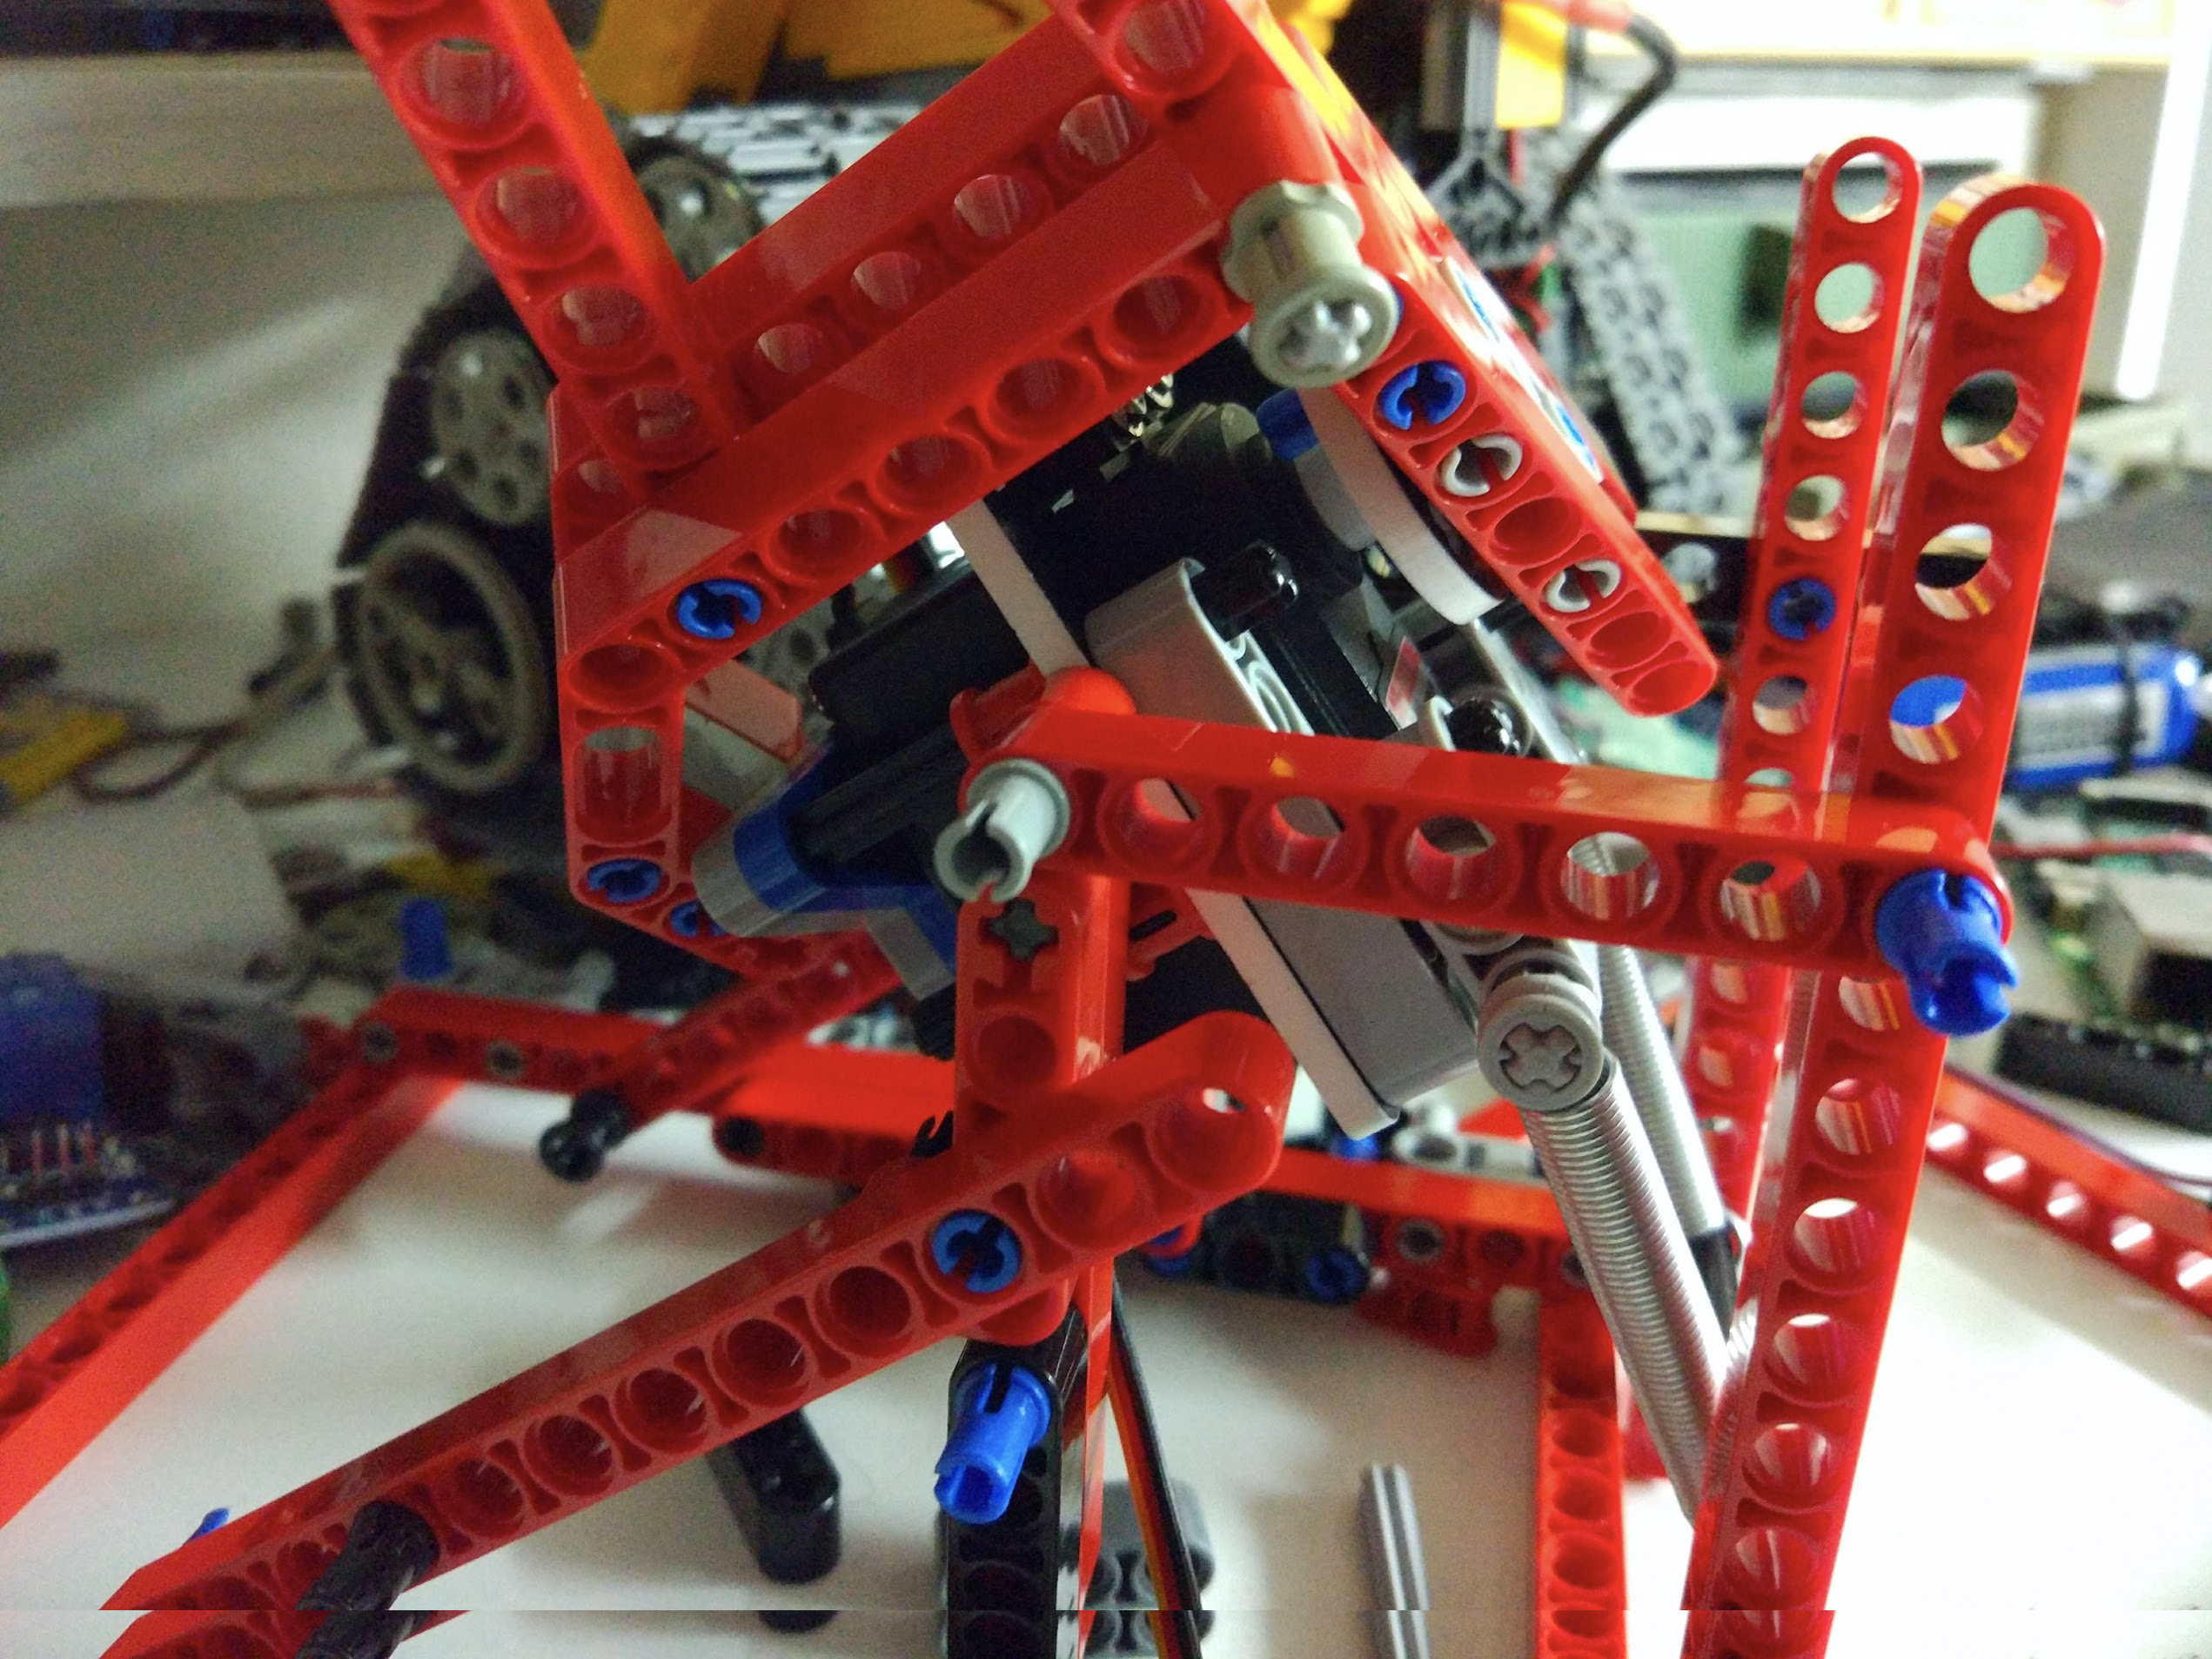
Iteration #3 – Second Prototype
After some trial, i think that the structure need to be changed, because at launch time, all the springs force is discharged to the servomotor pivot.
So I entirely destroy and rebuild the structure with this features:
- The first pivot (orientation rc servo) is horizontal and rotate the spoon on left and right.
- The second pivot (spring powered) is horizontal and launch the spoon
- The spring can be regulated
- The second servo control the launch mechanism
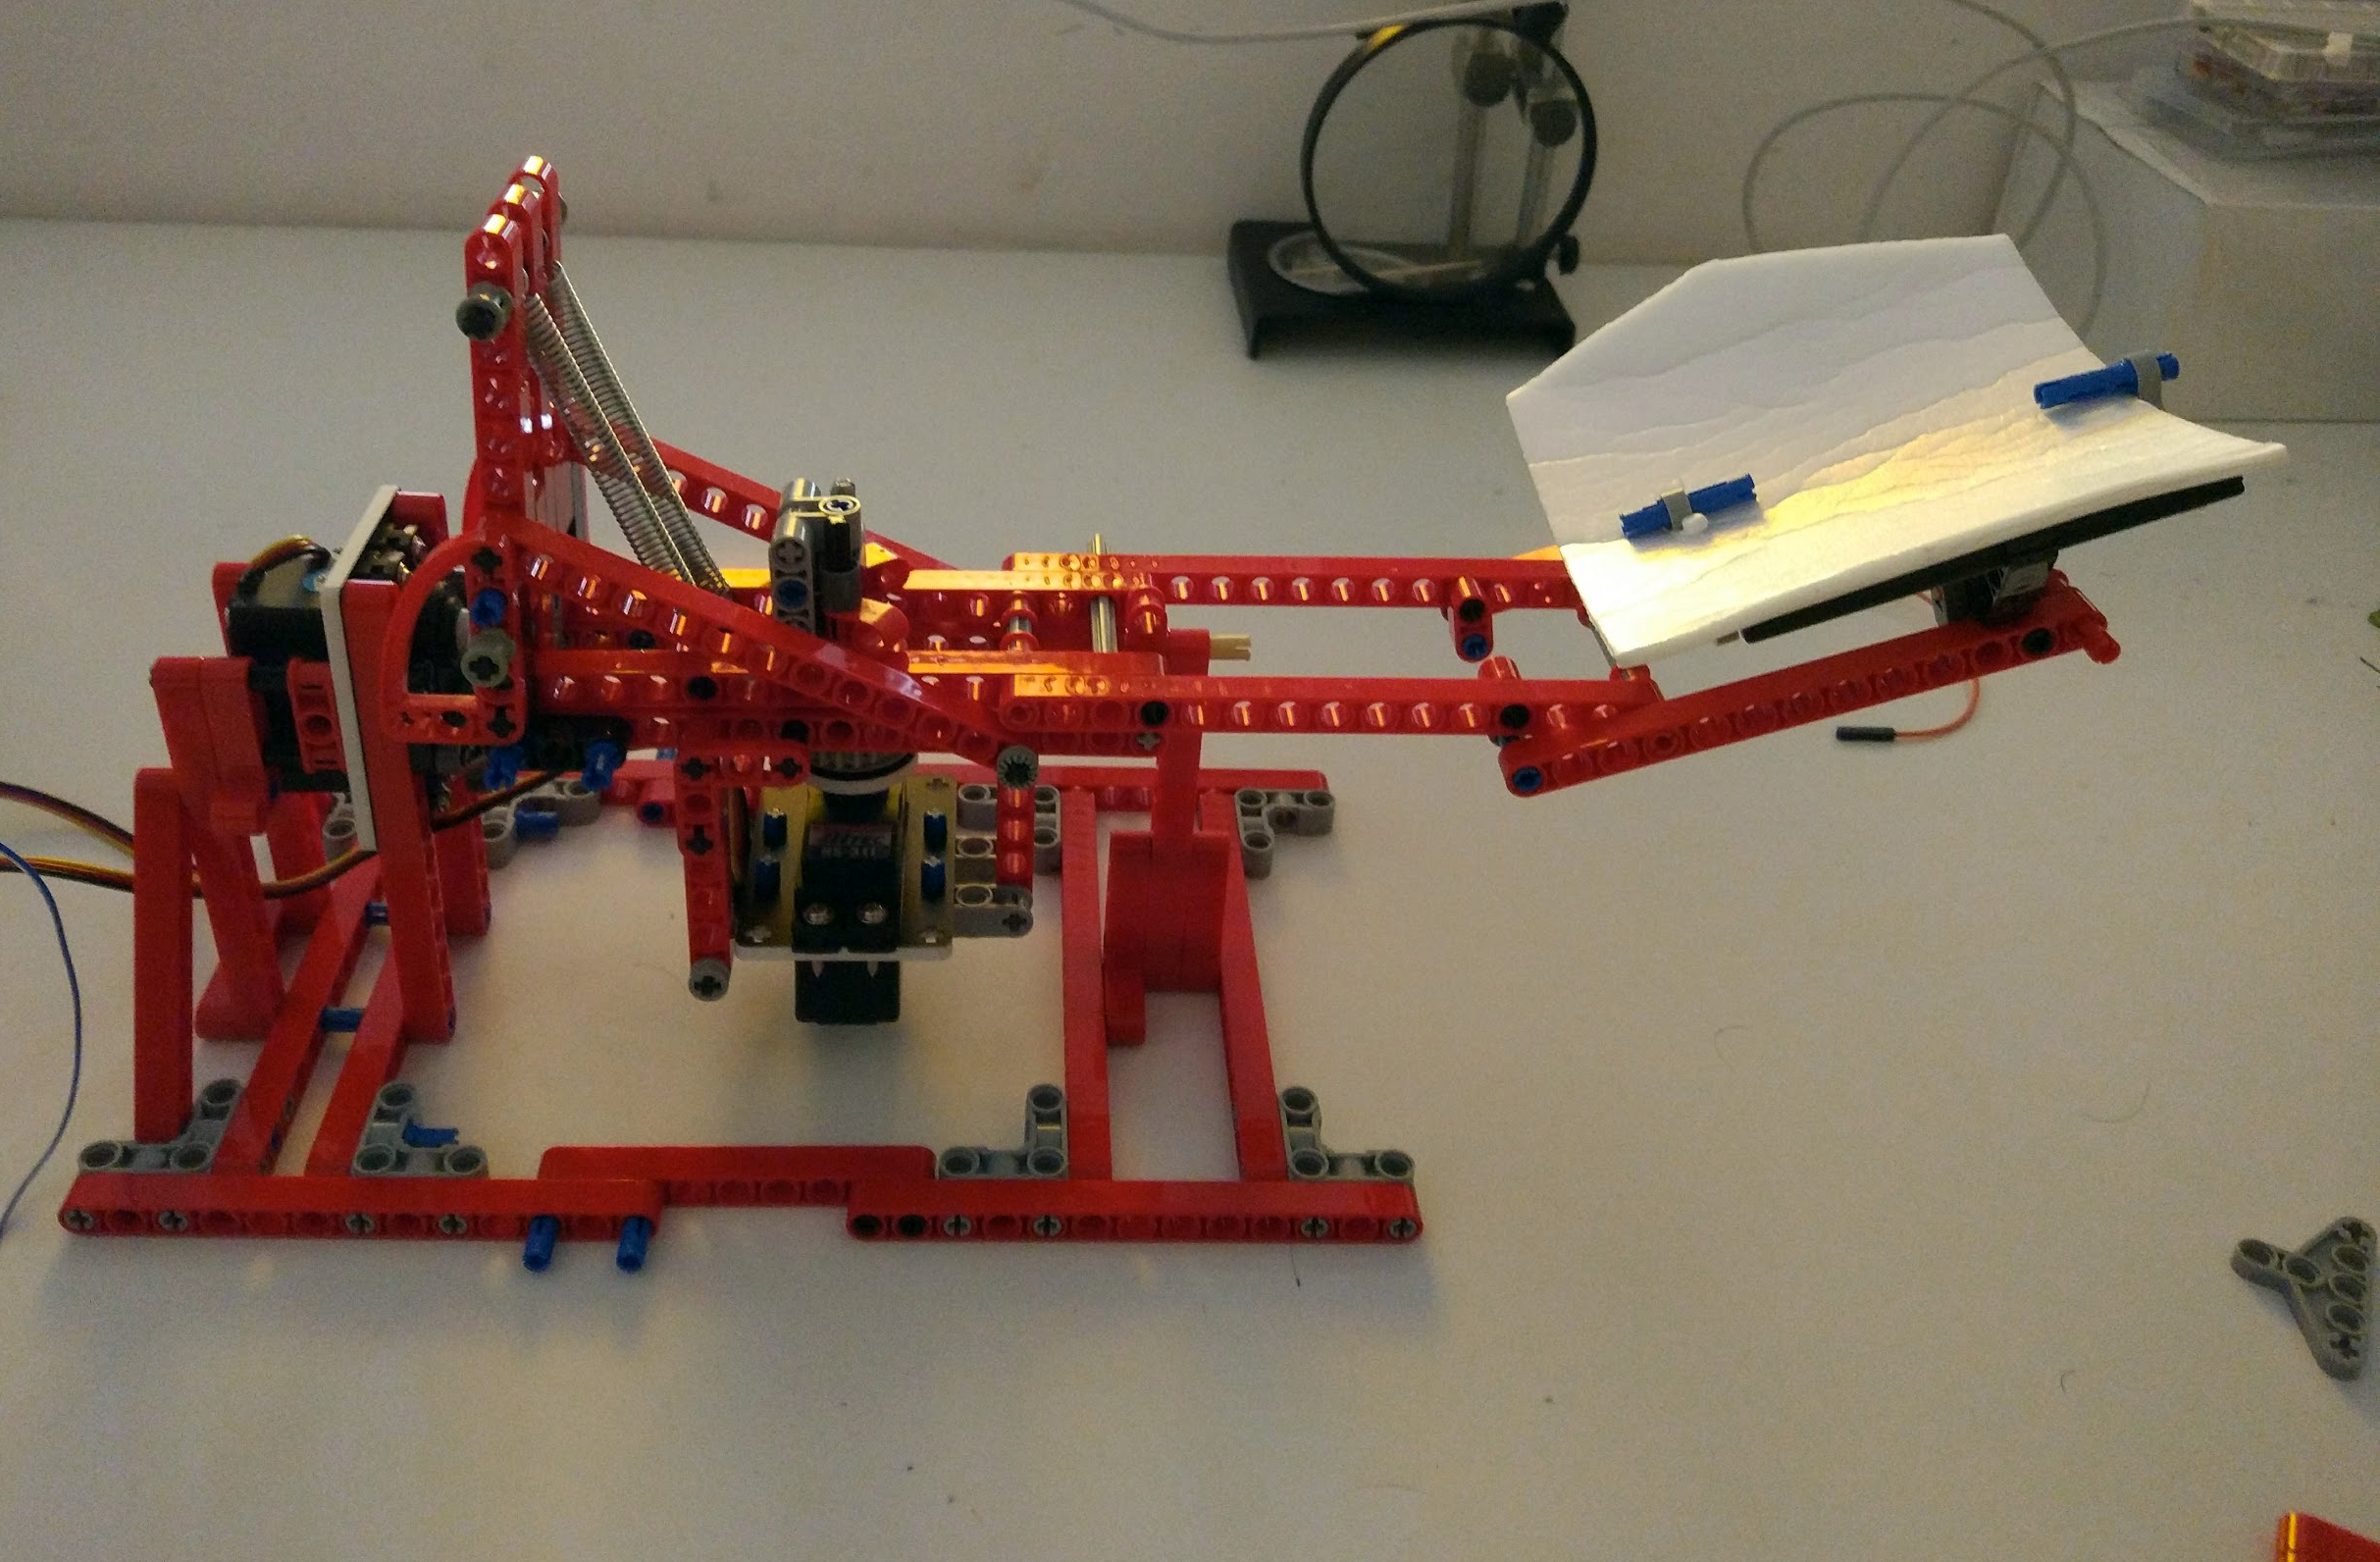
Iteration #4 – Extras
Now the system from functional perspective work, but need some extras:
- Mount all system on a polystyrene plan, to make solid and stable
- Make some in house test for
- Identifying the trajectory of cream and adjust some variable in code
- Establish a reasonable delta between the button press (too small makes the matches too short, too long is not supportable for the forearms of the players)
- Create a support for the player chin, so that the whipped cream hits the nose of the players
- User test at my birthday

Future evolution
My personal challenge is make a mechanical only version, without any electrical parts (no battery dependency, waterproof).